Tuesday, August 23, 2016

Here's An Idea

Do you like mushrooms?  I sure do!  In the Polish culture I grew up in, mushrooms were an important part of our cuisine.  I recently read an article about drying mushrooms in the dehydrator, and the lady who wrote the article just used regular white mushrooms like you buy at the store.  She said when they are on sale, it's a good idea to dry up a bunch of them to use when the prices are not so cheap.   Since I am always looking for ways to preserve foods naturally, I thought I would try this!   I have used dry mushrooms before, but they were dry wild mushrooms that we bought at the Polish market in our end of town, and they came from Poland.   They reconstituted well enough, and my Mom would put them in soups or gravy or mixed with sauerkraut.   One of my favorite ways of preparing sauerkraut is to cook it with a little chopped sweet onion, mushrooms, and a handful of barley.   When it is all cooked and mixed together, it makes a great side dish.   So, here I am preparing the mushrooms - I'll give this a try, as I have never done this.  I'm always trying to find things to dry with my dehydrator!  I will use these mushrooms in noodle casseroles, with kraut, added into gravy, or as omelet fillings.  Maybe I will try using the reconstituted slices on pizza and see how that works.   They would also be good added to wild rice hot dishes.
Slicing up several boxes of mushrooms last night in my kitchen!
A tray of sliced mushrooms ready for the dehydrator.
A tray of the dried mushrooms.   I dried them for 12 hours at 120 degrees on the dehydrator.
A couple of jars of 'convenience food' for the winter pantry!

Sunday, August 21, 2016

Onions, Onions......Do We Have Lots of Onions!!!

This weekend we harvested our onion crop.   The weeds pretty much take over the garden at this time of the year, and I figured I better get those onions out of the weedy, damp onion patch.   It seemed like a really nice day, so Harold and I began the harvest.  About 1/2 way through the process, it suddenly began to rain - and it didn't just rain, it came down in sheets while we ran to the house.   Of course, after that, when the sun finally came out again, we picked some more, this time in a little bit of mud.   Sure enough, 15 minutes later, another rain shower passed through and quickly went away, leaving us wet again.  And the onions, too!   We decided to give up the harvesting on Saturday, and continue on Sunday.   Today it was really nice and sunny, so we finished the harvest.   I ended up with about 12 big boxes of onions, about 120 lbs!  For the next several days I will be airing the boxes of onions in the sun and also on the porch (when the sun gets too hot).   The dirt should come off the onions easily as they dry.   We will sell some at market, keep plenty for ourselves, and give some away.   I will be cleaning and sorting the onions every day, taking off dry layers until they look real nice for market. 
     So what do I do with all those onions?  I use onions in just about everything I cook!  I also like to put lots of onions in my potato-cheese filled pierogies.   And there's nothing better than onions fried up with potatoes to go with an omelet.   Years ago I went to a German restaurant in New Ulm Minnesota.   There was a German saying stenciled all around the room in big letters, with an English translation underneath.   It basically said this:

"Of this all good cooks have one opinion,
No savory dish without an onion"

I always think of this restaurant when I cook with onions, and their little German saying about onions.
     If stored in a cool place, these onions will last us until next February or March.  I usually grow some sweet onions for salads and making fried onion rings (we have a good sized box full of those, too).  But yellow onions store the best, as compared to red or white onions.
Here I am holding a couple handfuls of freshly dug onions.

Some of the boxes of onions drying on a table in the sun.

 
Even bigger boxes drying!
  
A close-up of some of these big beauties!

Tuesday, August 16, 2016

Everybody Was Busy Today!

Today was a typical late summer day here on Honey B Farm!  Harold was out cutting wood, fixing equipment, and doing outside chores.   I was inside working with vegetables and fruits and canning.  The cats were all busy hunting.  We all had our jobs to do!
     Instead of cutting up the logs right in the woods after felling the trees and stacking them on the back of the pickup, and then hauling them to the house to be unloaded, Harold now drags in big logs from the woods with the tractor and cuts them up right where they will be stacked.   That saves a step or two.   Old people have to work smarter , you know!
This maple log was 30 feet long, and Harold couldn't maneuver it through the woods from behind, so he had no choice but to drag it out backwards!
He positions it right where it can be cut and stacked.
The winter wood pile is getting bigger!   We go through about 10 cords a winter.
He also dug up some potatoes for me from the pasture garden, and put up a solar electric fence and a radio out there because the deer and the raccoon were eating the corn, pumpkins and melons!  Putting a radio in the garden on a talk station seems to deter the animals, as they don't really know what a radio is and think it's a human out there.   If that fails, the electric fence does the trick!
Some of our new potatoes.   Unfortunately, as you can see we have a little bit of potato scab disease.   It doesn't affect the taste of the potatoes, and they are safe to eat, but they just aren't pretty looking.   Potato scab usually results from soil that is not acidic enough, and dry soil conditions, or too much water.  We've had nothing but rain lately, so it is probably too much water.   In spite of the scabbing, I still think the potatoes look nice.
As for me, I was busy canning tomatoes in the morning, and I worked with apples in the afternoon to make 2 gallons of applesauce.  I canned up 14 pints of delicious applesauce from a neighbor's apples.  This won't last through the year, but our friend Joe Miller has some apples we will get tomorrow that I can make more sauce from.   Homemade applesauce is SO good!   It makes a great dessert all winter long, and is wonderful mixed with hot cereal like Cream of Wheat or Malt O Meal on cold mornings.
Jars of beautiful tomatoes I just canned.  They come in handy for soups, stews, casseroles, rice pilafs, chili and chili mac, and for pouring over pork chops or chicken before baking.
A 2 gallon pot of fresh hot applesauce ready to can up.
Jars of applesauce cooling (one jar is set aside so it will seal quicker). 
Not only were Harold and I busy today, but so were the cats!   They daily patrol the farm, hunting and keeping all the unwanted critters at bay.   In all the 12 years I have lived here on the farm, I have never seen a LIVE mouse or vole or shrew or rabbit or chipmunk or gopher.   With anywhere from 12 to 18 farm cats (varies from year to year), those vermin critters don't stand a chance!
Some of my hard working cats enjoying a treat of warm milk this evening.  If you look closely in the upper left hand corner of the photo, you can just see the remains of a freshly caught mouse.   The kitties were doing their job!
Some of the cats get right down into the milk!
Well, this gives you a good idea of how our day went today!  Tomorrow we will get more apples, Harold will cut more wood, and I will pick and work with more garden produce. 

Saturday, August 13, 2016

Canning Talk

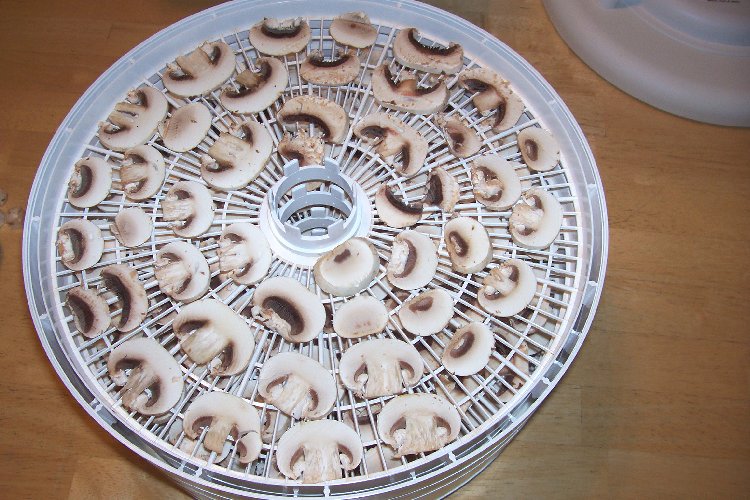
It's been a busy couple weeks as I do a lot of canning and freezing with all our garden produce!  Since we grow pretty much all the food we eat (with the exception of meat, flour, sugar, etc.),  I'm busy putting up a year's worth of food.   Actually I truly enjoy canning!  I find it very satisfying to grow and preserve what we eat.  I remember watching my Mom can up fruits and tomatoes and relishes.  Maybe that's where my love of canning started.   But I was in my 50's already before I taught myself how to do pressure canning, which is the method you must use when canning low acid foods.  I must admit that I was scared at first of using a pressure canner, and thought if I didn't do everything right it would explode!  I carefully followed every line of directions to a "T" as I worked, worrying at each step of the way.   Eventually I simmered down and realized that pressure canning was really easy.   Yes, you must do things right - but the house wasn't going to explode!
     Some things actually do better with freezing than canning.  I usually freeze carrots, peas, turnips and rutabagas.  Rutabagas, you say??  Yep - this is a vegetable I have learned to enjoy, especially in soups and stews.   It tastes similar to a turnip, but has a milder, sweeter taste.   It is excellent to throw in a small amount into a pot of vegetable soup.  I think it adds a nice depth of flavor to the soup.  Rutabagas are very popular up here in the north, too.  Scandinavians really enjoy them - roasted or mashed or mixed with potatoes. 
     I am pretty fussy about canning jars.  I swear by Ball jars and lids.   I have tried the 'generic' jars (probably made in China, ugh) and found them to have a lot of seal failures and breakages.  Same with Chinese made lids.   Don't use them!  I have talked with several experienced canners who have had the same problems I encountered with them:  seal failures and "wrinkling" of lids.   Also, don't use old mayonnaise jars for canning.  I know that many ladies say it's OK to use them, but the glass is thinner on them, and you are more likely to get a cracked jar in the canning pot.   What a mess!  I also don't believe in buying jars from Wal Mart.   I know this might annoy some folks to hear this, but I truly believe they have "seconds".  Wal Mart pays a very low price for things, and they get what they pay for.   I have talked with many ladies who have found (like I did) pieces of plastic in the glass, out of round jars that don't seal, chipped jars, cracked jars, and jars with odd seams.   If you do buy jars from Wal Mart, inspect them very carefully!  I once returned a couple cases I bought there and showed the customer service gal all the defects in the jars.   She pointed to a stack of them behind her that others also returned.   So it wasn't 'just me' that was unhappy with Wal Mart jars!
     Sometimes you can find those wonderful old - and very thick! - jars from the late 1950's and early 1960's at garage sales.   This was back in the heydays of canning and those jars were meant to last.   Even the rims were thick.   Back then, they made jars with lots of glass!!  By the way, a person should never can anything in those old blue/green jars, as in the old days they used lead in the process.   These green jars are collector's items for storing buttons or to use as vases for flowers, but not for food.
     The Ball company says you cannot reuse the lids, but yes, you can.  After all, when you buy a new case of jars, the lids are already screwed on tight and have rings in the rubber.   I called up the Ball company to complain about this and told them they were giving me "used lids" with my new case of jars!  The lids used to be packaged separately, but no longer are.   The Ball people told me that the lids "will recover nicely" in hot water.   Yes, they do.  And so do used lids in general!!  As long as there is good rubber on the lids, they will all "recover nicely" in hot water.   I reuse lids for things that are not processed for long times, like relishes and jellies and pickles.   But for the pressure canner, or foods that have long processing times, I will use new lids. 
     I know that canning things is more or less a dying art.  That's too bad.  In the midwest, canning is still quite popular, and in this neighborhood all the ladies do canning.   Canning used to be taught in home ec classes, but I don't think it is anymore.  Last year, all the women's magazines had articles on canning, so perhaps there is a resurgence of interest in canning.  I sure hope so!   We need to teach our daughters homemaking skills, and canning is a good skill to have.
Jars of green beans ready for the pressure canner
My trusty old pressure canner (that I was once afraid of!)
Most low acid foods are canned at 10 lbs of pressure.
I have several trays of tomatoes to work with.  I usually pressure can them also for safety and because it takes less processing time to pressure can them, rather than the long times in a boiling water bath.   Today's hybrid tomatoes are lower in acid than those of yesterday.  
Blanching diced rutabagas in boiling water for 2 minutes before freezing.
Then the rutabagas are cooled in cold water before packing into freezer bags. 
I am almost finished with all the food processing this year.   I only have applesauce, spaghetti sauce, tomatoes, pears,  and sauerkraut to can up yet.   And corn to put in the freezer later on.   It is SO convenient to have all the foods I need right at my fingertips all year long.   Let it snow!  (And with all the hot weather and humidity we've had lately, a little cooling snow would be a good thing right now, yes?) Maybe not............... 

Saturday, August 6, 2016

Poor Misunderstood Zucchini

At this time of year, anyone who has a garden usually has a boat load of zucchini to get rid of.   This is a very versatile (and prolific!) vegetable, but so often laughed at or misunderstood.   It's one of those "like it" or "hate it" veggies.  But zucchini actually is very good for you!  Not only is it low calorie, but has lots of vitamins and minerals and even some lutein.  It is a good source for potassium, too.   Yellow summer squash falls into the same category as zucchini, and tastes almost the same.
     Some of my favorite ways to prepare zucchini are the following:
 - Slice it in thin slices or cube it up, and saute with butter and oil and garlic and maybe some onion.
 - Include it in stir-fries
 - Cut small ones in half and scoop out the insides.  Fill with partly cooked rice mixed with shredded carrots and cheese and seasonings you like.  Stuff back in the shells and put into a flat baking dish.  Pour diluted tomato soup over all, cover with foil and bake at 350 for about 45 minutes until the squash is tender. 
 - Mix with beans and rice or with couscous
 - Cut large ones on the bias into half inch slices.  Bread with flour, egg and bread crumbs and pan fry the slices in butter and oil until tender.  Serve with a dollop of spaghetti sauce or put some shredded cheese on top and let it melt. 
 - put diced zucchini into pasta salads
 - mix cooked zucchini with spaghetti sauce and serve over your favorite pasta
 - make a cream sauce and add a little grated Parmesan, then add small diced zucchini and serve over fettuccine
 - put into omelets or mix with scrambled eggs

Of course, most people think of zucchini bread when it comes to this vegetable - and that's good too.    But, in my humble opinion, the best baking use for zucchini is this excellent cake!  It is moist, needs no icing, and you cannot tell there's zucchini in it!   If a person never told anyone there is zucchini in this cake, nobody would ever know!   I got this recipe out of a library book long ago in the 1970's, so I don't really remember the source.   But I have made and served this cake for years and everyone loves it.   Yes, it has a bunch of calories (I'm pretty sure of that!), but once in a while it's good to indulge.   I make this cake only once or twice in a summer and that's about right.   Something to look forward to when summer comes.
Zucchini Chocolate Chip Cake (recipe follows)
A serving of this delicious cake that nobody would guess has zucchini in it!

CHOCOLATE CHIP ZUCCHINI CAKE

2 1/2 c. flour
1/4 c. baking cocoa
1 tsp. baking soda
1 tsp. salt
1/2 c. butter or margarine (I usually use 1/4 c of each)
1/2 c. vegetable oil (like Wesson)
1 3/4 c sugar
2 eggs
1 tsp. vanilla
1/2 c. buttermilk (I use 1/2 c. milk mixed with 1 T of vinegar and let sit for 15 min)
2 c. grated zucchini (let sit for a while and then squeeze dry)
1 c. chocolate chips
3/4 c chopped nuts

     Mix together flour, cocoa, baking soda and salt and set aside.   Cream together the butter, oil and sugar in a mixing bowl until light and fluffy, using a mixer at medium speed.   Beat in eggs, one at a time, beating well after each addition.  Blend in vanilla.  Add dry ingredients alternately with buttermilk to creamed mixture, beating well after each addition.  Stir in zucchini.  Pour batter into greased and floured 13 x 9 baking pan.  Sprinkle with chocolate pieces and walnuts.  Bake in a 325 oven for 55 minutes or until cake tests done.  

Tuesday, August 2, 2016

Standin' In Tall Popcorn!

It's been almost 3 weeks since I posted anything on here.   We have been SO busy!  Summers are very busy for us here on the farm.  I have been canning and putting vegetables in the freezer, and we have had a couple weeks of house guests, too.   Harold's sister and  her friend came from Dallas Texas to visit us, and my son Kelly and his family were visiting after that.   We also had my grandson Adrian with us for a week.   He helped us with the farmer's market booth last week - he was my "bagger" and "vegetable waterer" with the spray bottle to keep things fresh.   Last week I also canned 49 quarts of peaches.
My grandson Adrian, holding two of his favorite kittens here on the farm.

I have two shelves of beautiful canned peaches in the pantry! They will taste so good this winter, when the snow is on the ground and it's 30 below zero!
Besides all the weeding and watering and grass mowing and picking veggies for the market, we have tried to find time to play games with family guests, visit the county fair, and take little day trips to areas around here.   We only have one more month of summer, and then the leaves will be turning and fall will be upon us again.   How quickly our summers go by!
     This year we also are growing popcorn!  This is the tallest corn I have ever seen!  The stalks are at least 7 1/2 to 8 feet tall, and each stalk has 2 or 3 ears on it.   We will definitely have a bumper crop of popcorn!
Here I am standing in the tall popcorn.  I'm holding a very uncooperative kitten who is wondering why I am taking him in among such tall plants!
Nothing really blog-worthy has been happening here on Honey B Farm, but I just wanted to say hi to everyone!  Hope you all are enjoying your summer!
     By the way, some of you have expressed difficulty making comments on here.   It is easy to comment.  Just click on "No Comments" or "1 comment" or whatever phrase has the word comments.  When you do that a box will show up.  Type in your comment.  You can choose how you want the comment to be seen.  There is a drop box - click on the arrow and choose one of the options.   Probably the best one would be Name/URL or Anonymous (if you don't want to publish your name).  Under Name/URL just put in your name, even your first name is good.  After choosing a name option, click on the Publish box and it will be done.   I don't get many comments to my articles, and I encourage you to write something.   I always like feedback!