Friday, February 23, 2018

Lots of Work and Lots of Mess - Part 2 (Almost Finished!)

Except for a few minor trim pieces and some new curtains and a new area rug, our bedroom project is finished.  We put everything back in and tonight we will sleep on our new mattress in the newly decorated/remodeled room!   All the furniture is back where it should be and the house is no longer in chaos!  All we need to do yet is buy and install a 14 ft piece of trim across the top of the wainscot, put up some wallpaper border, and a few baseboard pieces.   I will be ordering some new white curtains, too.  This bedroom project was almost a month in the making, but we are pleased with the results.

Now that this is out of the way we can start on maple syrup making next month, and next week I will be starting some seeds for peppers, flowers and some herbs.  It's about 11 weeks away from planting the gardens, but many plants need long germination times so I need to begin very soon.  Also I hope to plant some early things in my greenhouse in early April, so I need to get the seeds going now.   We always have at least one or two projects going!
Before we put things back into the bedroom, I gave the floor a couple coats of floor paint.  Someday we hope to put down laminate flooring, but that's not in the budget yet.
The newly painted floor looks great!
And here is the finished room, except for a few details:
Except for trim around the window and baseboard and across the wainscot, the room is done.   Now I'll be looking for something nice to put on the walls.
Now to get those garden seeds started................................

Sunday, February 18, 2018

Lots Of Work and Lots Of Mess - Part 1

We built our house in 2005 (by ourselves with the help of Harold's brother in law Tom) and finished most of the interior, except for our bedroom and part of the dining area and basement stairwell.  So finally after 12 and 1/2 years we decided to get the  bedroom done!  It's always been a matter of time and money (mostly money), but this winter we knew it was 'time to do it'.  So out went all the furniture and everything from the bedroom, scattered all over the house wherever there was room to put things.  Harold put up some scaffolding so he could finish the ceiling in relative comfort without having to go up and down a ladder.  (Scaffolding was on wheels, making for easy moving).  He had to re-do some of the drywall taping, as it had come loose over the years.  Remember, we were living with bare sheetrock walls all this time!  We also learned quite a lot about drywall taping over the years, so we needed to re-do what we had previously done.   This was a real messy job!  Drywall dust all over the house, dried up taping compound.........tracked all over.  We like a nice smooth ceiling and walls - none of that "popcorn stuff"!  So it took Harold many days to gets things smooth.  Then, there was painting the ceiling, painting the walls, putting up wallpaper on two of the walls, and some wainscot panels.   In order to properly put wallpaper on the walls, you need at least 2 or 3 coats of paint, plus wall sizing.   Everything took time!!

 We still have a lot to do yet: put another coat or two of paint on the wainscot panels,  trim around the wainscot panels, trim around the windows and baseboard (painted, of course), new curtains and curtain rods, and paint the floor.  We cannot afford any other kind of flooring at this time, so we will just paint the floor again.   Maybe someday we can put wood or laminate in there.   We also need to finish the closet, put the door back on, and finish the doorway between the bedroom and the bath.

When a person has to finish a room from scratch it takes a while!  We also had to buy a new mattress and box springs.  It had been MANY years since we purchased a mattress and we had sticker shock on the prices of mattresses these days!   I was also horrified to learn that today's mattresses are much deeper in construction, so none of my old sheet sets would fit.   I had to buy all new sheets - deep pocket style - and I got sticker shock from buying those too!  Wow, things are expensive these days!  The frame that we had the old mattress on didn't exactly fit the new mattress either, so Harold had to rebuild the bottom of the bed.  We like the old frame we had because it had storage drawers in it, which came in very handy for linens and such.  So basically everything we had to do in that room was a chore!  That's why I haven't been writing on here for a while.  We've been busy with construction projects!  Here is what we can report so far:
Here is the "before" picture. 
We have furniture pieces all over the place. 
There are bureau drawers all over the living room. 
Once we got the ceiling painted, I began painting two of the walls a light blue.
Then we began putting up the wallpaper on two of the walls.  I bought this wallpaper several years ago on sale (for $1 a roll!) at a re-store and thought I had enough for all of the walls.   Then I discovered the paper had a 20 inch drop match and so I wouldn't have enough to do all of the walls.  This paper isn't made anymore either.  So, paper on two walls and paint on two walls - good enough for me! The wallpaper was supposed to be pre-pasted, but since it was old I didn't trust it, and used wallpaper paste.   That, too, was a chore!
Then we began putting up the wainscot panels.  We used both adhesive and a staple gun.  The wainscot will have a trim across the top and bottom and sides.  We need to do that yet.
Harold measured carefully and cut out openings for the electrical sockets.
The wainscot panels are up and we put the first coat of paint on this afternoon.  Tomorrow we will paint again, and get the trim painted and put on the next day.
When we get everything done and put back together I will post  a picture of the finished room!  Meanwhile we have moved into the guest room - imagine that - we are "guests" in our own home!  Just tearing up one room of the house can sure create a lot of mess all over.  I will need to wash rugs, floors and do a thorough cleaning when everything is put back into place.   We will probably get all this done just in time to create more mess by putting up sawhorses in the living room and grow lights so I can start plants for the 2018 garden season in a couple weeks!  There's always something to do, ya know?  We are very good at making work for ourselves!

Wednesday, January 24, 2018

Absolute Favorite Bread Recipe

It's been quite a while since I posted anything on here.  There just hasn't been anything noteworthy to write about.   I think "winter doldrums" has set in............Not much news to say except that Harold fixed his black pickup truck (see post from December) and it is running fine.  He also had to fix a brake line.   I finally got around to cleaning my oven (a chore I truly hate!), and getting back to sewing projects and reading.   A sad event to report:  an owl killed three of my favorite cats.  I was very upset about this.   We know it was an owl from the wing marks in the snow next to one of the dead cats.  Sometimes things can be very cruel up here in the north country in the woods.

When I need some cheering up, a good thing is to get into the kitchen and bake bread.   Kneading the dough helps to relieve anxiety and tension, and the baking bread makes the whole house smell good.   Actually I pretty much bake ALL the bread we eat.   Rarely do I ever purchase store bread.  It seems like that stuff has no texture or taste or character.   I also rarely bake plain white bread.  Most of the bread I bake is whole grain and has some body to it!  Here is a recipe I use for a good portion  of the bread I bake.  It is a very versatile recipe and you can vary it however you wish.   I make lots of variations, and every bread seems to come out not only different, but good tasting!

BASIC BREAD AND VARIATIONS

2 cups of liquid - choose from plain water or milk and water or all milk or buttermilk or potato water 
                            or whatever you have - I usually use 1/2 milk and 1/2 water
2 T. honey or brown sugar or molasses (your choice)
2 pkgs (2 T.) dry yeast 
1/2 c. warm water 
pinch of sugar
2 tsp. salt (sometimes I use a little more)
1/2 stick of butter 
1 to 2 cups of "additions" (see note below)
4 to 5 cups or so of bread flour (add one cup at a time as needed)

Proof the yeast in the warm water with a pinch of sugar until foamy (cover the bowl)
Meanwhile in a large bowl, heat the 2 c. liquid, sweetener, salt, and butter in the microwave for about 3 minutes or until very hot and the butter is melted.  (If you don't want to use a microwave, heat in a pan)
Then add whatever you like from the additions list.  Let it sit until lukewarm and the yeast mix is foamy.   Add the two mixtures together and then start adding flour until you have a dough that you can knead..  Knead for about 8 minutes until smooth and elastic.   Put in a greased bowl, turn the dough to grease, cover with waxed paper and a towel and let sit to rise until doubled.  Punch down and shape into three 8 x 4 loaves and put into greased loaf pans.   Let rise until doubled and bake at 400 degrees for 35 minutes.  If using rye flour or potatoes, bake for about 38 minutes.   

Additions list:  Use ONE or TWO or maybe 3, but not too many flavors!  Too many flavors muddy the taste!
Choose from: 

leftover cooked oatmeal
leftover cooked hot cereal like cream of wheat
leftover mashed potatoes 
potato flakes from a package - about 1/2 cup
1 c. bran 
1 c. cracked wheat (soaked in the hot liquid in the bowl)
1 c. whole wheat flour 
1 c. rye flour 
1 c. 7 grain cereal
up to 1/2 c. wheat germ 
few tablespoons of barley flour 
some ground sunflower seeds (whirl in a coffee grinder)
old fashioned oats or quick oats
cornmeal or corn flour

some of my favorite combinations:
use honey, bran and potato flakes 
use molasses, corn meal and a bit of whole wheat 
use oats, brown sugar and whole wheat flour
use about 1/2 c. rye flour, potato flakes or leftover mashed potatoes, and honey

You can mix and match however you like.  I have found that using potatoes makes for excellent toasting bread.  Using honey as a sweetener keeps the bread moist.  You could also add an egg if you like to the dough, or use a little more salt.  If I am using a combo of whole wheat flour and bread flour only, I use 1 T. of salt.   You can also make some of the dough into loaf bread, and some of the dough into shaped dinner rolls.   Lately I almost always add a couple tablespoons of barley flour, as I believe it makes the bread taste better.

Here is a photo of the bread I made today with rye flour, bran, honey and a 1/2 c. of leftover mashed potatoes:
Three 8 x 4 loaves of delicious Potato/Rye/Bran bread
A close up of the inside.  You can see the bits of rye meal and bran in the dough.  I try to buy a coarse grind rye flour.  Bob's Red Mill has lots of good varieties of flours for bread making.  They make a nice coarse rye flour, bran, barley flour and 7 grain cereal.
Bread never lasts long in our house!  Husband Harold loves fresh hot bread, and so do the neighbors.  I think they can smell the fresh bread because they seem to show up at my door "just in time"!  Bread freezes well, so you can put one or two loaves in the freezer for later use.    This bread recipe makes a loaf that is not only good for you, but is packed with 'good' carbs and whole grains, and protein.   According to my Mom, she said her father always said - "you pray for your daily bread, so eat it!"

I do hope you will try this recipe soon!

Monday, January 1, 2018

Happy New Year To You!

A very Happy New Year to everyone!  Hard to believe we are starting another new year.   When I was younger 2018 seemed like way in the future, almost unimaginable - and yet, here it is!  This is the start of my 6th year of blogging.  I enjoy writing and sharing my life in photos here on Honey B Farm.  And I appreciate all of my readers.   I never dreamed that there would be folks all over the world reading about my small adventures here in northern Minnesota.   I wish more of my readers would comment occasionally so that I would get to know you better.   To my readers in Europe and Australia - please let me know who you are!
     As I usually do, I have changed the looks of the blog a little to reflect a new year.  January 1st always seems like a blank space to write new things upon.  Everything seems fresh and new, so I like to change things to reflect "new".
     As I write this, it is another cold morning here in the north.   We woke up to minus 30 degrees F - that's -30 F!  Supposedly this cold snap will end in a couple days and we will get back to our 'normal' cold in Minnesota.
Not one footprint on the snow!  Just like the first day of a new year - it is fresh and blank!
You can barely see the deer tracks at the lower end of one of the gardens.  They are searching for something to eat - old garden produce left, twigs, seeds, anything.  In this area, they are probably looking for some squash or pumpkins I left behind for them.
My greenhouse encased in snow and ice, waiting for spring! I can hardly wait for the warmth of March so I can  get in there and start planting.
I hope that 2018 will be a wonderful year for all of us, filled with hope, prosperity, good health and an abundance of God's blessings!

Saturday, December 30, 2017

Never Too Old To Learn!

Want to hear a good story?  Want to hear about how stupid I have been all these years?  Today I decided to take down the Christmas tree since it is 28 below zero outside and I have nothing better to do.  Well, I finally got a solution to a yearly problem:  how to store all those Christmas ornament hooks!  Every year it's the same problem - the hooks are a jumbled mess.  I have tried leaving the hooks on the ornaments, but they mostly fall off and become a jumbled mess in the box anyway.  Every year I shake the mass of jumbled hooks and a few come loose and I continue on this way until the tree is decorated.   This year I decided there has to be a better way.   Since I am such a traditional thinker, I'm not very good at thinking "outside the box".   So I tried Google for an answer.   I discovered that others had the same problem, but not many answers.  One guy said he put the ornament hooks on a piece of tape and rolled it up every year.   I thought that would be a real mess next year and didn't like his idea.  So I asked my husband Harold if he had any ideas.   He quickly said:  "Why don't you just stick them into something, like styrofoam?"  Wow!  Ding, ding, ding!!!  What an idea!  Then I had a good laugh at myself for not thinking of this sooner!  Sometimes things are just SO obvious, ya know?  Here I am, soon to be 70 years old in a few months, and I finally figure out how to store those things!   Thank you Harold!   What a clever guy he is.  Those of you who already do this, go ahead and have a good laugh at my expense.  Those of you who have the same problem, well........maybe I helped you?
    Here is the problem:
The yearly jumble of ornament hooks. 
And here is the solution:
Use those styrofoam trays that meats and produce come with to stick the hooks into.  Each tray will fit into a gallon ziplock baggie for storage.  Another good use for recycling those trays, too!
So here I am, almost 70 yrs old and I finally learn something new about Christmas ornament storage.   Sometimes I wonder..............
P.S.  William, if you are reading this, no comments about Polish, please!

Wednesday, December 27, 2017

Trying To Stay Warm In "Siberia"

Even by Minnesota winter standards, this week and this upcoming weekend is going to be one for the record books.   Although I probably shouldn't say that - back in 1996 we had an air temperature of minus 63 F, that's -63F degrees!!  That was the air temperature, not the wind chill!  I certainly remember that year.  But this whole week will be very cold.  Here is the prediction for the Fargo area, and we are usually about 10 degrees colder than they are:   high/low for the day
  • Today

    Dec 27

    -3° /-9°F
    Bitterly cold with sunshine
  • Thu

    Dec 28

    /-20°
    Cloudy with a bit of snow
    More
  • Fri

    Dec 29

    -9° /-27°
    Bitterly cold with some sun
    More
  • Sat

    Dec 30

    -17° /-33°
    Frigid with periods of sun
    More
  • Sun

    Dec 31

    -18° /-26°
     
    As you can see on Saturday this means we will be about minus 43 degrees.   Sometimes we are even colder back here in the woods.    Ah Minnesota!  Land of the frozen chosen!  But we all love it up here - the air is so "fresh".    We learn how to survive the cold.  The rest of the country gets crazy when temps go almost to freezing.  We just laugh about that up here.   People often ask us how we can live in those cold temps.   Well, you dress warm, burn plenty of wood (or other fuel ), plug in your cars and trucks and tractors (and in small towns you can leave your vehicles running while you are doing errands in town), and you make sure any animals you have are protected.  Our homes are well insulated, we dress in layers, AND you just get used to it! 
    My car is plugged in to insure it will start on these cold mornings.  The heater is attached to the bottom radiator hose.  On some cars the heater is attached to the engine block.  There are other various ways to attach heaters to a car or truck or tractor to make sure it will start.  The other morning we had minus 30 below zero, and my car started up just fine.  We don't have a garage, so this is the next best thing we can do! (Look at our winter beehives in the background)
    Our outdoor wood burning stove that runs our radiant floor heat inside, is burning nicely!   Good thing Harold cut plenty of firewood when it was warmer.  We go through about 10 cords of wood each winter to heat our home.  The radiant floor heat is in the basement cement floor in coils, so the whole house is nice and toasty.  
    My farm cats survive in their outdoor cat house.  Inside their house is a large insulated wooden box with lots of thick blankets in it.  We have hay bales inside and out front, too.  This weekend we will put a heater in the cage you see pictured by the side of the house and put it inside also.  This way the cats cannot get to the heater, but it will heat things up a little more inside for them.   The snow also insulates the entire house.  You can also see our beehives in the background.  They also have heaters and thermostats in them, so hopefully the bees are doing well!
    A closer look at my cats sunning themselves this morning while the outside temperature was 20 below zero.
    So we Minnesotans have fattened up nicely during the holidays, and we're ready for the hibernation months of January and February!  We'll drink lots of hot black coffee and talk about "how cold it is" outside ..............and that's how we survive the winter! 

Friday, December 22, 2017

Learning How To Make Swedish Flatbread

Today Harold and I went to visit our friends Bill and Pat who live about an hour and a half northeast of us.   They live in the beautiful pine country of northern Minnesota.  Pat makes an excellent Swedish flatbread (but she is of some Norwegian heritage), and she taught me how to make it today.  Flatbreads are made by many Scandinavian Nordic folks in a variety of ways.  They are all pretty much the same:  large rounds of thin, crisp crackerbread that is broken into pieces to eat.   They are made with a variety of grains and buttermilk, a little leavening,  and a bit of sugar and salt.  Flatbread is very good just buttered, but I suppose a person could also put a little cheese or a thin slice of meat on top, too.  Flatbread is made similar to lefse, but no potatoes are involved, and the dough is cooked to a crisp, and further dried with a short baking in an oven.  These flatbreads can be stored indefinitely in a tin.  I don't know about the "indefinite" part, though, because they sure don't last long around my house!  Last year Pat gave us some as a Christmas gift and I can tell you they didn't last more than a day or two - they are so delicious.
     Before we began the flatbread making, we started off with a nice lunch!   You need energy to make flatbread, right?
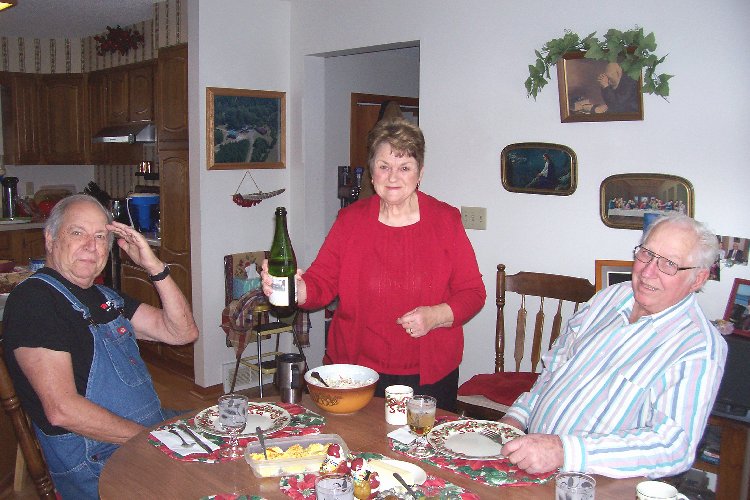
Bill, Pat and Harold pictured here.  That's not wine - she is pouring out sparkling apple cider!  She had a delicious lunch of vegetable lasagna, salads, garlic bread and desserts. 
 Then we began the flatbread making:
The ingredients for making Flatbread:  corn mix, graham flour, regular wheat flour, buttermilk, sugar and salt.  You also need a rolling pin and a long lefse stick, and a plain ungreased griddle.
The dough is mixed in a large bowl, first by spoon, then by hand.
Pat sections off the dough in one inch thick slices.
The dough is rolled out on a well floured cloth, with a regular rolling pin, as thinly as possible without tearing or making holes.  Because there is a little baking soda in the dough, the rounds end up being somewhat thicker than lefse, about the thickness of a thin saltine.
The dough is baked on a hot 450-500 degree dry grill until there are light brown spots on both sides and the dough is no longer raw.   It is then placed on a cookie sheet in a 300 degree oven for just a few minutes, turning once.   The flatbreads are then placed on a rack to dry out until completely crisp.
One finished flatbread cooling on the rack.
We are finished!  The stack of about 15 flatbreads is ready to store now.
A closer look at the stack of crispy flatbreads before we broke them into pieces for storing.
Two tins of flatbread pieces I got to take home!  They are so good just buttered and eaten with a cup of coffee, tea or hot chocolate or cider.   When you want just a "little something" to eat with a hot beverage, Swedish Flatbread can't be beat!  It has a nice grainy taste, and is only slightly sweet.  
Here is the recipe as Pat gave to me:


Swedish Flatbread

1 box cornmeal muffin mix(I use Jiffy)
1 C. Graham flour
1C. white flour
1 C. buttermilk
1 tsp. soda
1 T. plus 1 tsp. sugar (add a little more if you want it sweeter)
Roll out thin and fry until light brown on lefsa griddle at 500 Degrees
Place on cookie sheet in 300 degree oven until it starts to harden . It gets stiff like cardboard.
Cool and break into pieces.  
Makes about 12 to 15 rounds, depending on how big you make them.

Monday, December 18, 2017

Lefse Day!

As any good, true Minnesotan knows, lefse and Christmas go hand in hand!  This Scandinavian specialty is eaten by the thousands (probably hundreds of thousands) by Minnesotans during December.   Even those of us who are not Scandinavian enjoy these treats.  Lefse is just plain good!  The Norwegians like to eat it with lutefisk - cod soaked in lye and then boiled to death until it is a gelatinous mess - but we won't go there.   Real Norwegians tell you that lutefisk is good if it is properly prepared.   The smell of it alone is enough to put most folks off.  But I digress.........
     At Christmas time lefse makes a good lunch or snack with tea or coffee.  It is usually spread with lots of butter, then either white or brown sugar, then rolled up and eaten out of hand.   Lefse is sort of like a potato tortilla.   Eating lefse during the holidays is almost a sacred ritual with most Scandinavians.   Recipes and techniques are handed down through the generations, and everyone says "Grandma's was the best".   I never ate lefse before coming to Minnesota, but when I tried it for the first time I KNEW I had to learn to make it!  I am 100% Polish heritage, so learning to make lefse was a new thing for me.   I didn't have any Norwegian grandmothers to show me anything.   The first time I learned about lefse making was from a square dance caller's wife many years ago.  I read lots of cookbooks and watched videos on the internet and tried my hand at lefse making over the years.   I also watched a Swedish lady from our church make lefse one day in her kitchen.  I eventually got pretty good at it, if I say so myself!  One day I had a couple of Norwegian heritage fellows (guys) over at my house.   I gave them some of my lefse to try and asked for their opinion.    They said it was "pretty good" and that I got it "nice and thin" - which is about as complimentary as any Scandinavian will get!  They ate lots of it anyway.   So it must have been OK.   Even pet dogs and cats love lefse around this time of year!  My farm cats go nuts over it.   They get the sort of overcooked pieces and those that are not shaped good.   They aren't fussy!

Today my neighbor and good friend Marlene came over to help me make lefse.  I made sure she took plenty home with her.
Here is Marlene rolling out the dough.
She transfers the rolled out piece to the hot griddle with a special long "lefse stick".  Stores around Minnesota sell these griddles, usually made by Bethany House, and also all the other equipment for making lefse.
This is what a nice thin piece of rolled out lefse looks like on the griddle.
When both sides have little brown spots and the dough is no longer moist, usually a minute on a 425 degree griddle, the lefse is folded in half and placed between towels to soften.
I like to put a warm, moist towel over the top of the pile of towels.  I find that the moist heat helps to soften the lefse quickly.  This way you can eat them sooner!!
Marlene holds a piece of perfectly cooked lefse ready to eat!  Thank you for your help today, Marlene!
This is equipment you must have for successful lefse making:  a well floured cloth (be sure to tape it down good to your surface) , a special grooved rolling pin with a stocking cover, and a long thin stick for transferring dough from the cloth to the griddle.   The dough is made into small patties. 
A close up of one of the patties of dough, ready to roll out.  You can see small pieces of potato are still visible in the dough, but these will flatten out with the grooved rolling pin.
This is what the rolled out lefse looks like before going onto the griddle.  It should be rolled as thinly as possible.   Old Scandinavian grandmothers say the dough should be thin enough to "read the newspaper through".   Transferring the dough from the floured cloth to the griddle can be tricky if your cloth isn't floured enough.   This is why the long thin stick is used.
Here is what the rolling pin looks like under the stocking cover.   The grooves in the rolling pin give the lefse the traditional crosshatched look.  I see where a little bit of dough got stuck to the grooves through the stocking cover.   I will have some cleaning to do with a stiff brush!
A couple years ago someone gave me this cookbook of 91 Ways to Serve Lefse!  The traditional way is still the best, but this book does have some interesting variations.  (Like rolling it up with meats or cheeses or spreads)
If you are interested in making lefse and you can get the required equipment, here is the recipe I use:
4 cups of riced potatoes - yes, you must use a special potato ricer!!
1/3 c. butter
1/2 cream - I use Half and Half. 
1 tsp. salt
1 T. sugar
Flour as needed. 

Peel the potatoes and boil them just until tender.  Drain well.  I use a colander for this, and then put the potatoes back into the hot pan to dry out a little more on the hot burner for a while before putting them through the ricer.  Measure the 4 cups of riced potatoes by gently putting them into a measuring cup - don't pack down too hard.   Meanwhile heat the butter, cream and salt and sugar until very hot.  Mix this into the riced potatoes and refrigerate overnight.
     Next day - the potato mix must be cold - add 1/2 cup of flour for each cup of riced potatoes.  You might need just a little more, but not too much.  Too much flour makes for "tough" lefse.   Mix with your hands and form into balls or patties using about 1/4 cup of potato mix.  This is the messy part!  Put these on a plate or tray and refrigerate them, removing only one ball at a time to work with. 
     Using a large cloth or one of those special lefse rolling cloths they sell at the hardware stores, flour it well.  Roll out each ball into a very thin circle.  Transfer to the griddle and brown one side (about a minute or less) and use the stick to flip it over to cook the other side.  Put cooked lefse between towels.  Store in a refrigerator.  To serve, lefse can be reheated in a microwave for a short time if you like warm lefse.
Makes about 16 pieces. 
You must use dry type of potatoes like russets.  Don't boil your potatoes too long, as they will be too moist.
There are lots of recipes and You Tube videos of lefse making on the internet, too.

Here is a cute poem I found regarding lefse:  (some Scandinavian lefse humor)
Yew tak yust ten big potatoes
Den yew boil dem til dar don.
Yew add to dis some sveet cream
And by cups it measures vun.

Den yew steal 'tree ounces of butter
And vit two fingers pench some salt.
Yew beat dis wery lightly
If it ain't gude it is your fault.

Den yew roll dis tin vit flour
An' light brown on stove yew bake.
Now call in all Scandihuvians
Tew try da fine lefse yew make!
..................ya, you bet'cha uff da!

And here is a nice piece of today's lefse ready to eat:
Yum!  Buttered and rolled up with brown sugar and slightly warm...........I'm going to grab a cup of coffee!